- Shooting lots of photos can create lots of trouble over time
- Having a good process for getting things done really helps
- File naming is key
- A little extra time before you start can save lots of time later

When you start taking lots of photos, whether for fun or for profit, having a great workflow can save you not only time but trouble. And lots of photos can mean lots of both.
When I come back from an event, whether it’s a football game or college graduation, I can have close to 2,000 images from two cameras. Often, I can only have a couple of hours to get them to the person who needs them. Regardless of the number I shoot, the ones I submit have to great images and technically perfect for either the web or a printed page. To do this, I need a really good workflow.
What’s a Workflow?
The term “workflow” comes up in a lot of creative fields. What it means is simply an optimal and repeatable process for doing things. With one, you never have to think about what you do next, you just focus on doing it as well as you can.
I find that workflow doesn’t change very much with the kind of assignment I shoot. Even when I travel and come home with a week or more of photos, I have a way of dealing with them that’s very similar to how I deal with a one-day assignment.
A good workflow begins even before you start shooting. I’ll talk about that next.
Before You Go
The foundation of a good workflow is a good setup before you begin shooting. If you shoot a lot of photos, you may already have these covered already. If not, it’s never too late to start.
File and folder naming conventions are critically important. Even without any sort of photo library structure, a good naming scheme can help you find photos shot years before. This is an example of what I use:
VT_Jes-GSoc_110825_187.jpg
- The first chunk identifies the group. In this case it includes the client (VT), a regular in my case, and the event, (Jes-GSoc). I have my own way of abbreviating things, so I know the event translates to “Jesuit High School Girls Soccer” (on their way to becoming the 2025 OSAA girls’ champs). In the IT world, that kind of abbreviation is known as a mnemonic, just clear enough to remind you what it stands for.
- The next is the event date as a 6-character string. This is the only thing I regret about the original naming scheme I started a dozen or so years ago. I’m using the impractical American date format, MMDDYY. Using the common international format, YYMMDD, sorts much better on your computer.
- Finally comes the sequence number identifying individual photos. This can be 3-digit (001) or four (0001) depending on the number of photos in the shoot. The zeros help with sorting. I’ll talk about how I get these later.
- I use the underscore ( _ ) character to separate the naming elements and the dash ( – ) for any clarity I need in the event name. It may sound picky, but it makes looking for files and folders a lot easier.
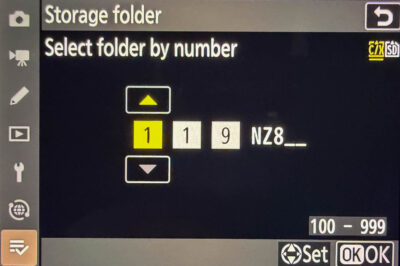
My cameras let me assign photos I shoot to a folder with a name I choose. I have a folder naming template for those folders that identify the camera. The ca the file naming template. The one thing I want to avoid is having duplicate file names coming in from the two cameras. That means extra work.
Also, because I use to cameras, before I go, I make sure their clocks are close to being in synch. You’ll see why later.
Finally, as soon as the card goes back into the camera, I change the folder name to the next number in sequence and make sure the playback folder shows up as “empty”. This avoids the time-consuming task of having to split out two jobs from the same image folder when I unload the card.
When I get Back
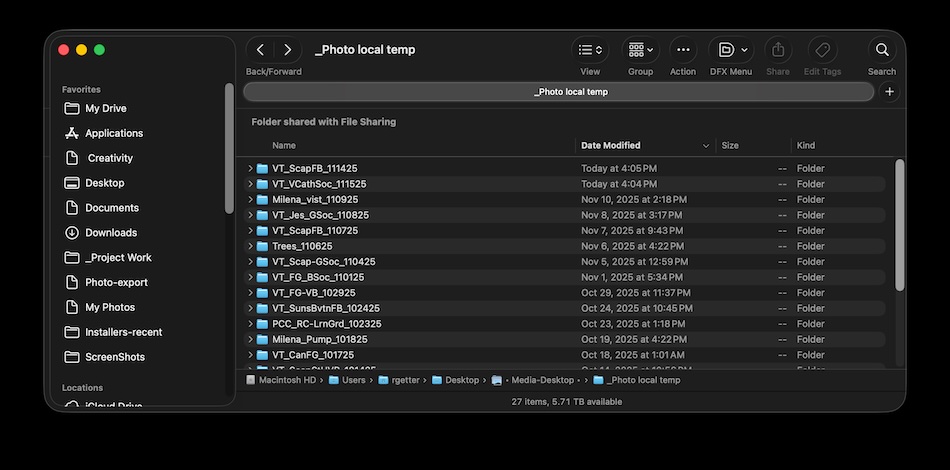
The first thing I do when I get back home is to unload the card to a folder on my system drive. Space on an SSD is precious, so they don’t stay there for very long, but it saves me a lot of time to work on them there. With my cameras, the RAW files that I always shoot are 35MB per image, so I don’t want to wait for a hard drive to read files. A few weeks after the project is over and done with, I’ll use Lightroom to move them to external drive I use for long-term storage.
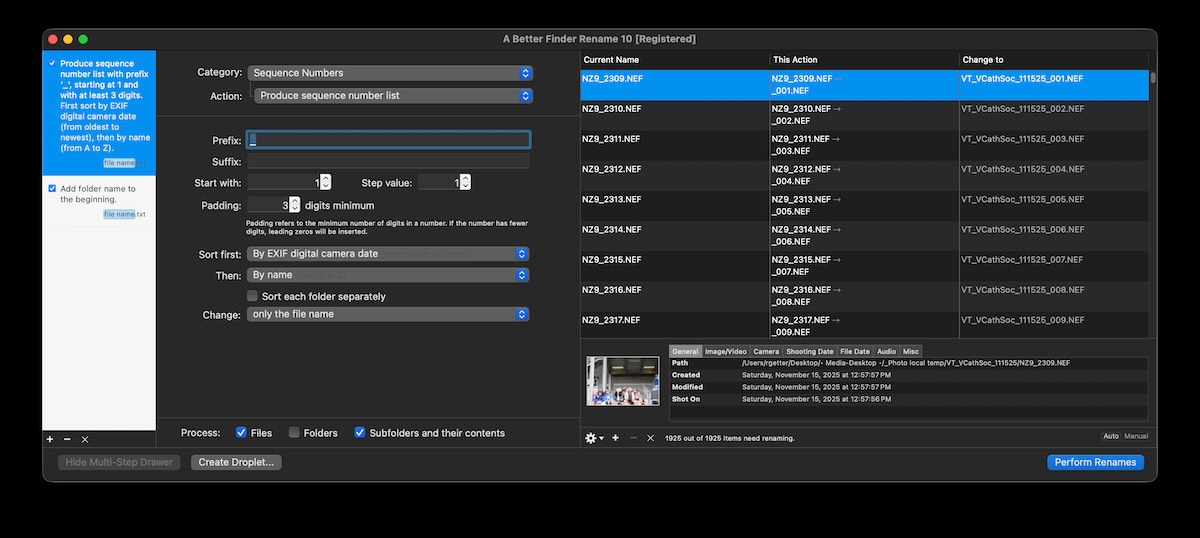
Next, I rename the image files so they’re made up of the folder name, followed by an (you guessed it) underscore and a sequence number. Because I’m on a Mac, I use Frank Reiff’s incredible A Better Finder Rename. There is also a similar program for Windows available on publicspace.net, but beyond finding a link for it online, I know absolutely nothing about it. But according to its write-up, they both can use the metadata on the image file to sort the images based on the moment they’re shot. This is particularly important if you’re using two cameras (and why I told you to make sure they’re clocks are close to matching). And if any of you have tried out the Windows version, please let me know how it goes.
Before I eject my memory cards, I check and make sure there is enough space left on them to cover my next couple of projects. I don’t clear them after every shoot for two reasons:
- Creating and erasing files affects the lifespan of solid-state memory. I’d be interested in hearing what an engineer has to say, but I believe this will extend their life a bit (or not).
- I spend a lot time tweaking my camera’s settings and save the settings file on the card. I have to remember to re-save them when I erase the card
Into Lightroom
That done, I import them into Adobe Lightroom and create a catalog named based on the file/folder naming I created. My regular clients all get their own catalog folder to simplify things.
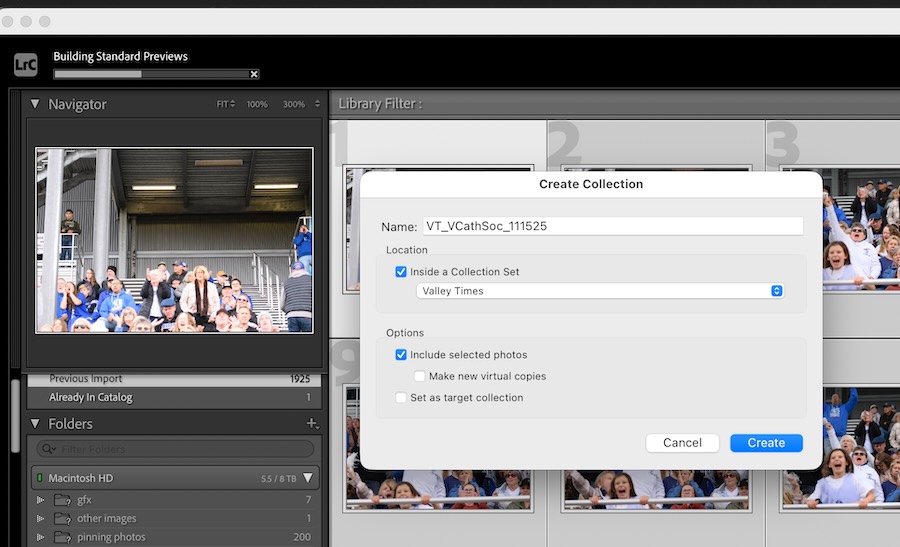
One trick I discovered is that Lightroom will let you start working on an image in the Develop mode while it’s still processing previews. That can take a while if you have hundreds of images you’ve just loaded.
Another trick I stumbled upon is that if you have the caps lock on, Lightroom will automatically advance to the next image when you set the flag in the filmstrip. That makes it easy to mark a lot of images as rejects, like if you accidentally shoot a burst of photos by bumping into your shutter when your camera is set to shoot 12 frames per second and pointed at your foot.
Working in Lightroom, I simply go in sequence. If an image is an obvious fail because of blurring, composition, or whatnot, I mark it as a reject (X key). If it’s okay, but not something I’m going to hand in, I just pass by it. There’s a chance the editor may call and ask if I still have a shot of a certain player for a feature story he’s doing. If the shot’s a keeper, I’ll dive into Lightroom’s magic to make it work, there and then. For the record, the first thing I usually do is crop and straighten. If there is a problem with focus or action blur, that will become obvious, and I will mark it as a reject and move on.
Ready to Deliver
When I consider it done, I’ll flag it as a pick with keyboard “P”. When I change my mind on a certain flag state, I can use “U” to reset it to unflagged, whether a pick or a reject.
Finally, before I consider myself really “done”,
When I’m done, l use the Filter feature to obtain only the files flagged as picks. I’ll look at my picked photos in the gallery view to see if there are any that stand out with a very different color balance or exposure and will fix them in Develop.
One thing I do for my clients as something special is I use the gallery printing feature to create a PDF with thumbnails and filenames of all the images I’m submitting. Please don’t tell anyone that trick. It’s my unique value-added for customers.
Photoshop and Bridge?
Personally, I think that the fastest and generally best way to get through a ton of photos is by using Lightroom. It is both a great file management tool and specialized photograph processing tool.
- It makes things like masking for adjustments incredibly quick and easy.
- It has tools available if you really want to go deep into color and exposure adjustments from a variety of directions, from cinematic color wheels to Photoshop-like curves.
- If you need to shoot at very high ISO’s (think Friday night high school football when the lights aren’t all that great), it has a very smart noise reducer. It can also add a grain effect if you’re an old Tri-X fan.
- It has a tool that lets you defocus backgrounds or foregrounds, like when you don’t have photo releases from the folks in the background and you’re shooting with a wide-angle lens where they’re perfectly sharp.
Alternatives
Lemkesoft’s Graphic Converter for both Windows and Mac is a great value at under $40. The idea is to develop an efficient process for working with your image so you can make the most of your time and get the best possible results. And there’s no reason why you can’t keep improving and streamlining your workflow. Mine didn’t start out as it’s outlined here and probably will keep changing and getting better as I go on. But when you’re dealing with deadlines, it’s not a good time to be figuring out what’s best to do next and going back to fix something you forgot to do.
If you can recommend any alternatives, let me know (in via a comment) and I’ll add it here.
Credit Where it is Due
Though I’ve been using Lightroom since the software was just a beta release, I have to credit a lot of my best work and neatest tricks to Julianne Kost. Not only is she Adobe’s Photoshop and Lightroom genius-in-residence, but she is also one of the best teachers of anything to do with computers that I’ve ever learned from. I’ve had the privilege of attending a number of her talks at Adobe MAX and regularly turn to her blog to learn about new features and find better ways of doing what I do. Even if you can’t attend one of her sessions, in person or via video, her writing is crystal clear. She is, of course, a rather brilliant artist in her own right. If you get nothing else out of this article, checking out her trainings will make all the time you spent reading worth it!
Leave a Reply